Our Painting services provide the following:
The key to a successful paint job is preparation. The better preparation of the surface, the more professional the finished job will look. Hiring a professional to paint and decorate your property is always the best option. That way, you no longer have to worry about all the prep work.
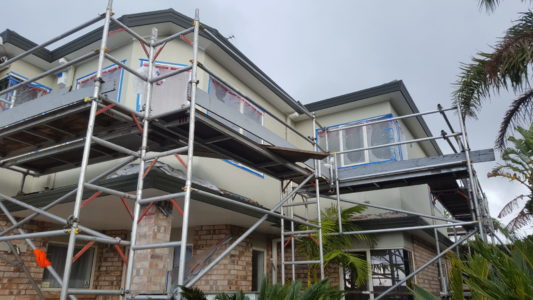
Exterior Preparation
- Full pre-paint power wash to clean all surfaces thoroughly for removing chalky paint, dirt, dust, cobwebs, etc.
- Detergent power wash to remove heavy stains, moss, mould, mildew or lichen.
- Scraping any loose, peeling, cracking, chipping or flaking paint.
- Sanding all areas thoroughly and wiping surfaces to remove dust before priming.
- Caulking of cracks where caulking has failed.
- Caulking of nail holes where nails have sunk into the siding.
- Wood putty large gaps or holes in trim or siding boards.
- Masking off unpainted areas such as doors, windows, trims, base cladding, etc.
- Placing drop sheets around the house to create a clear access path prior to painting and for property protection against paint spills, paint debris and dirt.

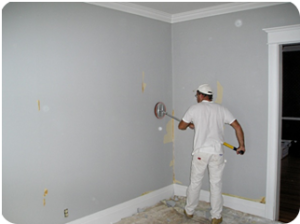
Interior Preparation
- All of the heavy furniture is moved to the centre of the room and covered with drop sheets.
- The flooring is covered with paint-proof drop cloths.
- Other valuables are covered or moved out of the way.
- Major cracks in ceilings, walls, and trim are filled and caulked if necessary.
- Walls and ceilings are prepared by patching up any holes or cracks.
- Any chips or peeling on the trim is sanded and primed before applying paint
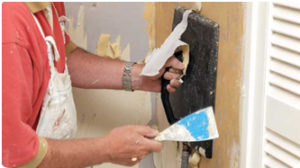
Wallpaper Stripping
Removing wallpaper can be a messy, wet process so drop sheets are laid below the area being worked on. Light fittings, vents and outlets need to be masked off with tapes to avoid damage and to stop water and glue getting into them.
The basic idea of removing wallpaper is to soften the paper using very hot water, scrape it off and then remove the glue. A wet sponge or wallpaper steamer will speed up the process.
Some wallpaper will not absorb water easily due to the semi-waterproof facing, and this is where a scoring tool can come in handy – it puts lots of little holes in the paper to allow the water to penetrate.
Our first step is to use the scraper to gently pull up the edge of the wallpaper piece by piece, and get as much of the facing off as possible. This can often be done without wetting the paper and hopefully it comes off in fairly big pieces. This is a time consuming process, and we need to be careful and gentle with the scraper – you don’t want to damage the wall behind it.
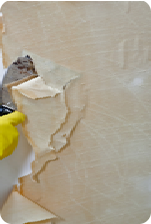
After we have most or all of the facing off the wall, we will start using very hot water (as hot as we can carefully handle) with a sponge or mop to soak the backing paper and soften the glue. The water will run down the walls, so we make sure enough drop sheets or towels are in place. The glue can take 5-10 minutes to soak right in.
As the backing paper softens with the water, we gently scrape it off carefully not to gouge the wall too much, as it will make more work to fill before we paint or re-paper. We make our way slowly but surely around the room, making sure we get as much of the backing paper as possible off, but not worrying too much about the glue itself.
Once the backing paper is off, it will be tempting to call the job done, but a layer of old glue will remain and it needs to be removed for a good finish. Thus, we make sure the room is well ventilated, and consider wearing safety glasses if spraying solvent on to high places. After spraying on the solvent we wait for it to take effect as per the instructions and then very gently scrape it off and dispose of it by wiping it on to newspaper or cloth. A thorough job is done here and when we are finished removing the glue, a nice, clean surface is accomplished.
Finally, once the wall is dry, we use the scraper and the joint compound to fill in any gouges or scrapes in the wall surface, as per trade standards. When the joint compound is completely dry, we give the whole wall a good sanding – we are done, with a ready to paint or re-paper wall.