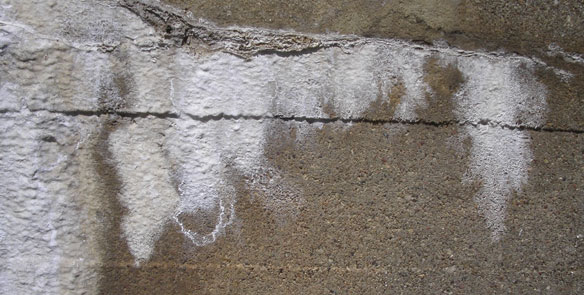
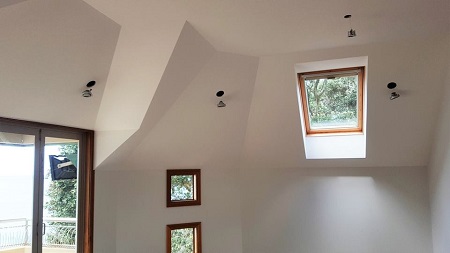
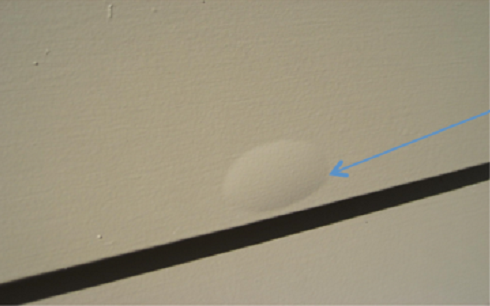
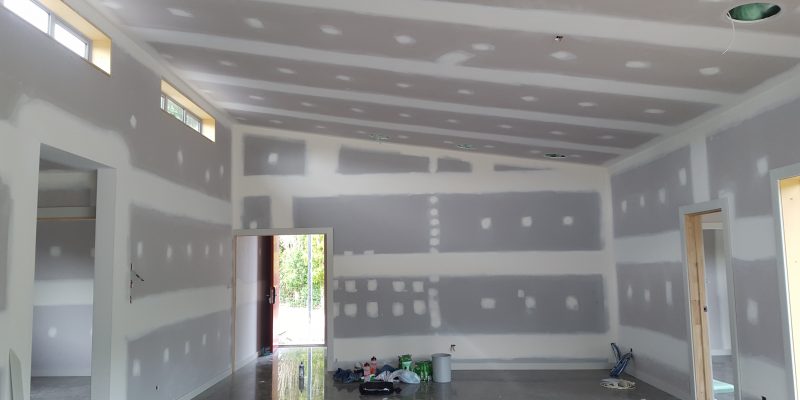
Common Paint Problems: Efflorescence

Another common paint problem occurs as a result of the movement of water from underneath the surface of the wall. This movement causes the occurrence of efflorescence on the surface, which can definitely mar the beauty of a well-painted structure.

Efflorescence is the term used to describe crystalline (or powdery) deposits, usually white in colour, that sometimes form on the surface of brickwork, concrete plasters and other concrete type structures. Efflorescence appears as a white deposit of mineral salts on face of concrete walls and/or floors.

Efflorescence is caused by moisture ingress. This then reacts with carbon dioxide in the air to form insoluble calcium carbonate. As the moisture enters and moves through the wall or floor, it dissolves mineral salts present in the cement. This mineral salt solution eventually finds its way to the surface of the concrete. As the water evaporates, it leaves behind a white deposit of mineral salts on the surface. Normally efflorescence is only of cosmetic concern although it can ruin the appearance and physically damage paint coatings.

Efflorescence is most often the result of uncontrolled moisture movement caused initially by poor design details and poor construction techniques. Before attempting to remove efflorescence the source of moisture getting into the substrate should be eliminated.

Ensure:

  • Joints and cavities are properly sealed;
  • Rainwater run-off is diverted to suitable drainage;
  • Physical barriers are in place between brickwork and in situ concrete;
  • Tops of parapets have cappings and windows and doors have suitable flashings in place;
  • Cavities are well-ventilated;
  • Vapour barriers are used to stop uptake of groundwater.

Efflorescence can be removed by physically scrubbing with a stiff brush and careful washing. Waterblasting may result in a continuation of the efflorescence as more water may be blasted into the substrate.

Proper Sequence for A Painting Project

Professional painters always follow a sequence in their painting work. These steps are proven effective in finishing the job with the best results. This ensures that property owners are not only satisfied, but also get great value for their money.

An effective painting sequence involves:

  • Planning the proper order for painting the entire room.
  • Starting with the ceiling first and going down to the walls and woodwork is always the best plan. The floor should be left for last.
  • Cutting in around the edges starting from the corner of the room where the wall meets the ceiling using a 2-inch or 2.5-inch brush.
  • Rolling the roller slowly onto the paint in a tray and applying it evenly onto the ceiling.
  • Using 3- to 4-inch brushes for painting large surfaces on the walls and doors.
  • Using 1- to 2-inch brushes for painting around the more detailed areas such as the windows and molding.
  • Making sure that the walls are completely dry before applying painter’s tape around trim and moldings so it can be painted.
  • Painting the inside sash on double-hung windows first before moving on to the frame and then on to the outside sash and the external frame.
  • Making sure that all the hardware on paneled doors are properly covered with masking tape.
  • Starting from a corner of the floor that diagonally lies opposite to the room’s exit.

Following a proper sequence is necessary for getting any work done correctly and professionally. It is the key to a fresh and clean-looking home.

Paint Finish Types

Different types of finishes are used on various surfaces. The method for cleaning painted surfaces also depends on how glossy it is, i.e. the finish type. Listed here are some of important information that you need to know about Paint Finish Types.

It’s important to understand that not all paint manufacturers use the same standard when naming their paint finishes. We can choose a finish by the level of gloss that the paint has.

Flat Finish – 0 to 5% gloss

A paint with a flat surface that does not reflect light and generally used on ceilings and walls. Flat finishes are usually non-washable and cleaning is not advised but could be wipeable lightly and gently.

Low Sheen Finish – 10 to 25% gloss

A durable paint with a low sheen and gloss reminiscent of an eggshell. Low sheen finishes are normally used on walls, have a slightly higher sheen level than flat, and clean better than flat finishes as they can endure moderate level cleaning.

Satin Finish – 25 to 35% gloss

A durable paint with a smooth, velvety gloss texture. Satin can be used in high traffic areas because it can hold up to heavy cleaning and light scrubbing. It is most often used for doors, windows, and other trims.

Semi-Gloss Finish – 35 to 70% gloss

Paint with a semi-gloss finish goes on smoothly and has a nice gleam without being too dramatic. Hard wearing surfaces such as trims, doors, windows and cabinets are the surfaces most applied with semi-gloss including other wet areas such as kitchens, bathrooms and laundries.

Gloss Finish – 70 to 85% gloss

Gloss paint has a shinier finish than semi-gloss and is popular for trims, doors and cabinets. Careful attention should be given to prep work and undercoats to create a smooth surface for glossy paint. Also recommended for wet areas as indicated above.

High-Gloss Finish – 85% gloss and higher

This highly luminous sheen has the greatest amount of gloss and looks almost like plastic. High-gloss paint certainly offers durability and washability, making it ideal for cabinets in the kitchen, bathroom, and laundry. The reflective surface of this paint finish exaggerates imperfections, so prep work is important to a clean polished look.